Extending JupyterLab With New Kernels
Within Jupyter, kernels are separate processes that are started by the server. They are the magical piece of Jupyter that allows you to run your code in different programming languages and environments. JupyterLab (the newest iteration of the Jupyter user interface) supports scores of kernels and provides support for nearly every major programming language including Python, Java, Scala, R, C++, Julia, Matlab, Octave, Scheme, Processing, and many more. Out of the box, however, Jupyter will only run the IPython kernel.
In this article, we will look at extending the Jupyter/Spark Docker images we have created previously earlier to support two additional kernels, Scala and Java.
- Scala is a popular programming language that combines object-oriented and functional programming idioms into a concise, high-level language. It utilizes static typing to help avoid bugs in complex applications, and it provides a large ecosystem of libraries that allows for developers to productively work with many major data processing systems (such as Spark).
- Java is a general purpose, strongly typed, class-based object-oriented language. It is often compiled to a bytecode instruction set and executed on top of the Java Virtual Machine (JVM). One of the most successful programming languages of all time, Java is used extensively in enterprise and data processing systems. Many of the most important data infrastructure systems including Kafka, ElasticSearch, and Spark use Java extensively as part of their core systems.
We will look at the steps required to deploy the Scala and Java runtimes, download and deploy the BeakerX kernel (which provides support for both Scala and Java), and register the kernel with JupyterLab.
This is Part 4 of an ongoing series on how to use containers and Kubernetes for Data Science. For background and context, please refer to:
BeakerX
BeakerX is a collection of kernels and extensions to Jupyer that provide a number of powerful enhancements. These include JVM support, improved Spark cluster support, polyglot programming (the practice of writing code in multiple languages in order to capture functionality and efficiency not available in a single language), interactive plotting for JVM based languages, tables, forms, and dynamic publishing.
In a single pass, installing BeakerX will allow us to install kernels providing Groovy (a JVM based scripting language), Clojure, Kotlin, and SQL in addition to Java and Scala. It will also allow us to greatly enhance the support available in our JupyterLab instance for working with Spark structures. We will look at some of BeakerX's features later in the article.
Packaging BeakerX
BeakerX is available from both pip and conda, and only depends upon a Java runtime environment. As in the other articles in this series, we will be using pip. For that reason, we can be up and running with it quickly. We need to:
- Install the
beakerxpackage usingpip - Run the
beakerxcommand from the package, which will register the Kernels - Integrate the Jupyter lab extensions and build the dependencies. Installing lab extensions requires
npm. If you are using a Dockerfile similar to the example below,npmwill be already be available as part of the base image.
The example Dockerfile utilizes the spark-k8s-kafka image available as part of theOak-Tree DataOps Examples repository for its base. spark-k8s-kafka includes a number of Data Science, GIS, and deep learning libraries that are used as part of the Oak-Tree Data Science JupyterHub environment.
Because Jupyter Lab is installed globally in the container, we switch to the root user in order to install the beakerx CLI tool and associated kernels (pip install beakerx && beakerx install). Then we activate the new Kernels by installing the beakerx-jupyterlab extension.
Next, we install Apache Maven, a package manager for Java and Scala. If mvn is available in the container image, it is possible to install packages dynamically through the use of a special "Cell Magic" %%classpath. Finally, we set the runtime uid back to 1000 (jovyan), and update the PATH.
FROM code.oak-tree.tech:5005/courseware/oak-tree/dataops-examples/spark245-k8s-kafka:latest

USER root

# Install BeakerX
RUN pip install --no-cache-dir beakerx \
  && beakerx install

# Install JupyterLab extensions for BeakerX
RUN jupyter labextension install @jupyter-widgets/jupyterlab-manager \
  && jupyter labextension install beakerx-jupyterlab

# Install Maven
RUN apt-get install -y maven

# Set User back to jovyan/1000
USER 1000
ENV PATH "/opt/kafka/bin:/opt/spark/bin:/opt/maven/bin:${PATH}"
A copy of the above Dockerfile is available from the DataOps example repository as Dockerfile.hub-beakerx.
Testing the Image Locally
When the container finishes building, we will want to test it locally to ensure that everything installed correctly and ensure that Jupyter Lab starts.
# Build and tag the image
docker build -f Dockerfile.hub-beakerx \
    -t code.oak-tree.tech:5005/courseware/oak-tree/dataops-examples/spark-k8s-beakerx .

# Test the container image locally.
# Jupyter Lab/Notebook is started using the command: jupyter lab
# The --ip 0.0.0.0 option is provided so that it will bind to all interfaces of the
# Docker host.
docker run -it --rm -p 8888:8888 \
    code.oak-tree.tech:5005/courseware/oak-tree/dataops-examples/spark-k8s-beakerx \
    jupyter lab --ip 0.0.0.0
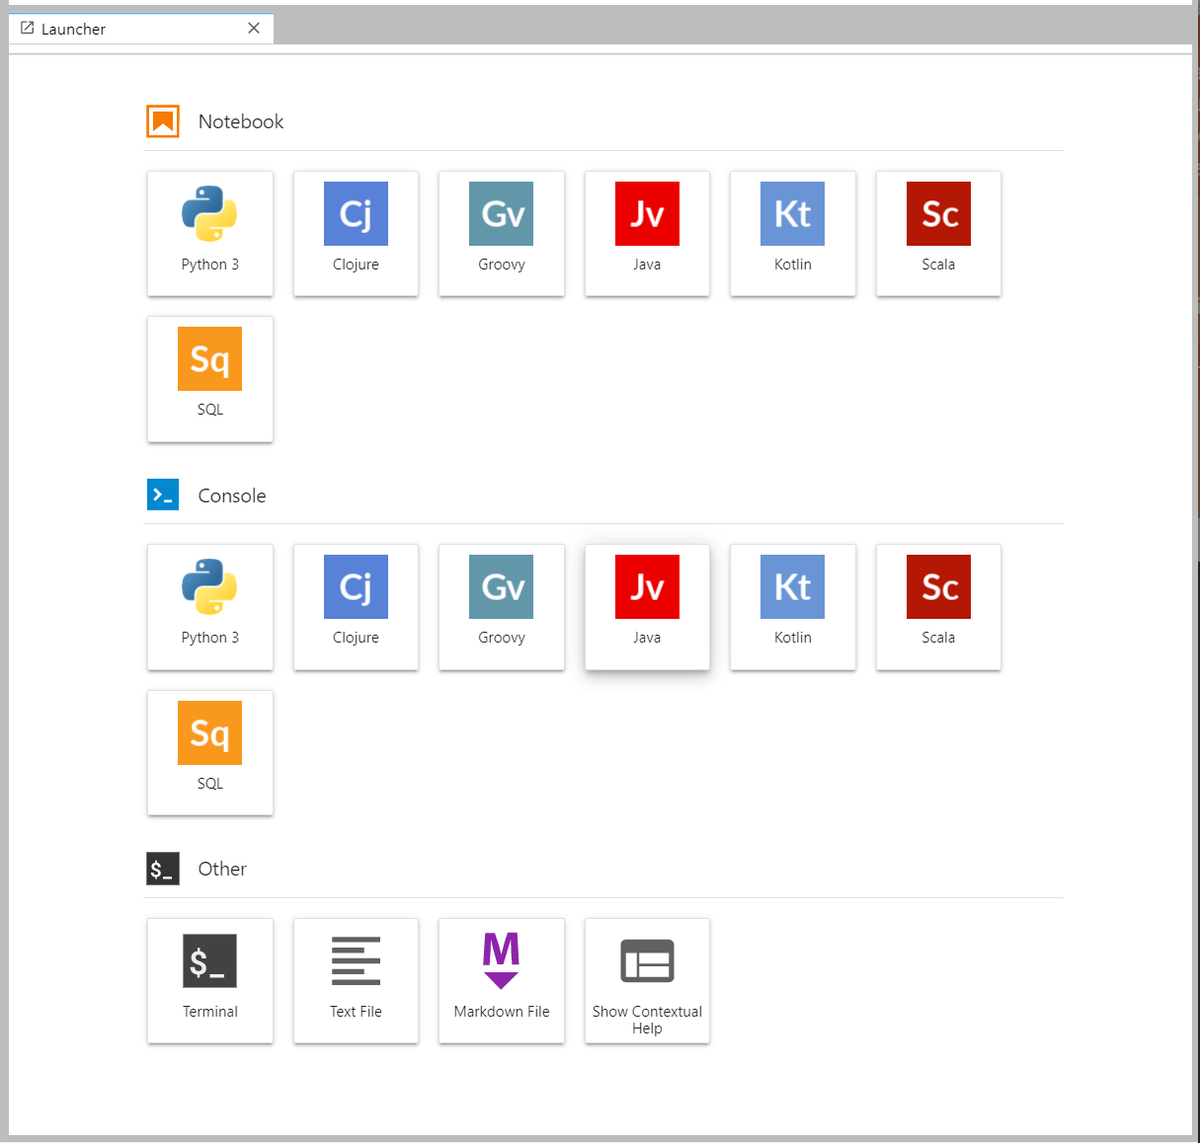
Once the program starts, you will see the access URL for the notebook. Copy the URL (including the token) and paste into the browser. This will open the Jupyter Dashboard/Launcher.

If BeakerX installed correctly, you will see six additional options under the "Notebook" and "Console" sections including Scala, Java, Clojure, Groovy, and Kotlin.

Testing the Container in Kubernetes
Once you've verified that the container works locally, we should also validate that it runs in Kubernetes. That involves:
- Pushing the container image to a public repository for deployment
- Launching the instance inside of Kubernetes using
kubectl run - Connecting to the container instance by mapping a port to the pod using
kubectl port-forward
Please refer to Part 2 of this series for detailed instructions and sample kubectl commands.
Test Driving BeakerX
One of the best ways to get a feel for BeakerX is to see it in action. In this section we'll look at three of BeakerX's marquee features:
- Example 0: Dependency Management
- Example 1: Spark Integration
- Example 2: Plotting and Visualization
BeakerX exposes much of its functionality in the form of "magics." Magics are handy commands built into Jupyter that make it easier to perform specific tasks. They are exposed as macros that can work on a single line (called a line magic) and a complete Jupyter cell (called a cell magic). Jupyter includes a whole host of builtin magics that can be used to do many useful things. Line magics start with a percent character % and cell magics start with two, %%.
These examples are adapted from the notebooks included in the BeakerX documentation, available from the project's GitHub repository.
Example 0: Dependency Management
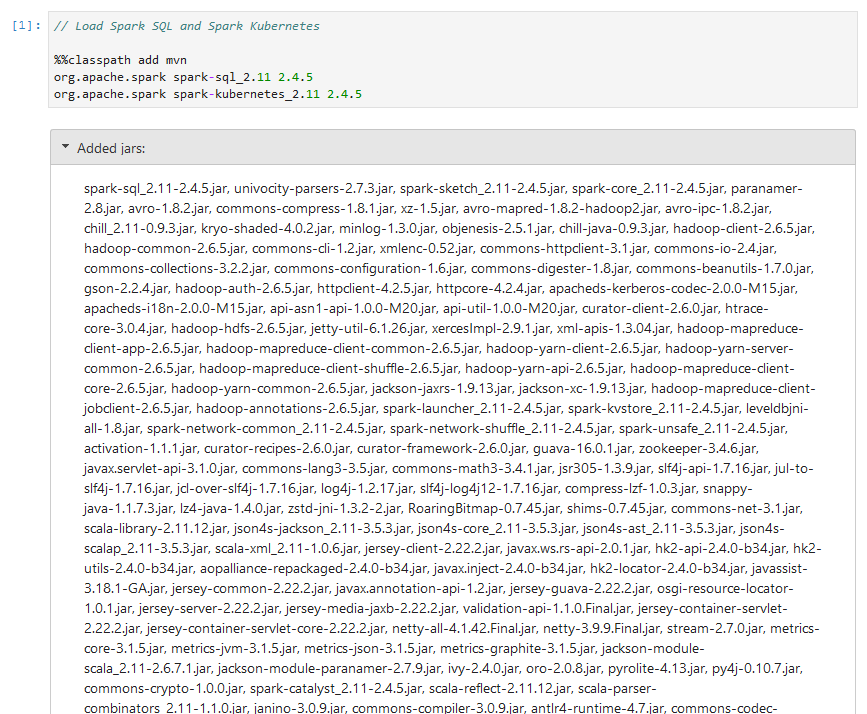
BeakerX includes a %classpath magic which can be used to add jars to the classpath of the JVM. %classpath can be used with Maven to dynamically fetch and load packages along with their dependencies. It can also be used with jar files.
%classpath can be combined with %import (which causes a class to be visible) and %unimport (which will cause a class to be hidden).
// Example 1: Load JAR directly
%classpath add jar /path/to/jar/demo.jar
// Example 2: Load Spark SQL and Spark Kubernetes using Maven

%%classpath add mvn
org.apache.spark spark-sql_2.11 2.4.5
org.apache.spark spark-kubernetes_2.11 2.4.5
Example 1: Spark Integration
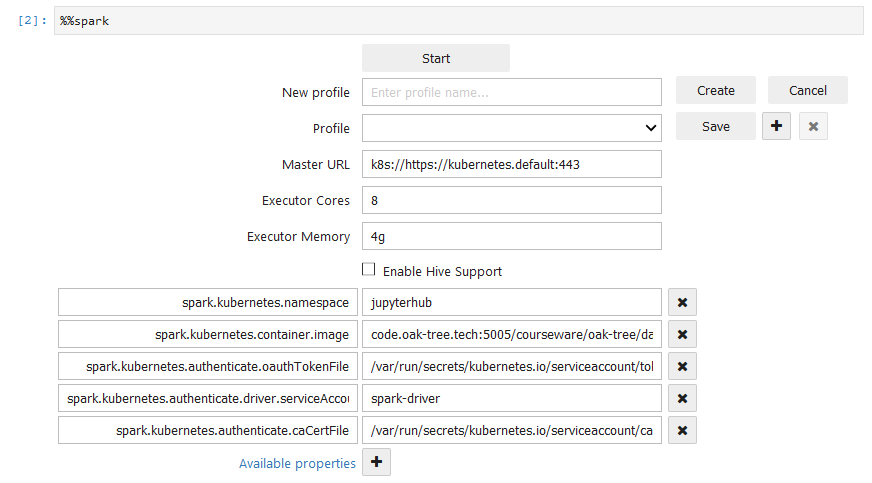
The %%spark magic allows for you to load GUIs to manage Spark's configuration and cluster connection, check on job status, inspect data with an interactive widget, and forward kernel interrupt messages to the cluster so that you can stop a job without leaving a notebook. It is compatible with Spark 2.x.
Manage Connection Parameters
The magic can be run all by itself in a cell, which will produce a dialog that allows you to fill out connection options to connect to your cluster.
Alternatively, it can be combined with a SparkSession.builder method call to manually configure components of the session.
// Configure session options

%%spark
SparkSession.builder()
    .appName("Spark-K8s Connection Demo")
    .master("k8s://https://kubernetes.default:443")
// Load Spark dialog and configure connection
%%spark
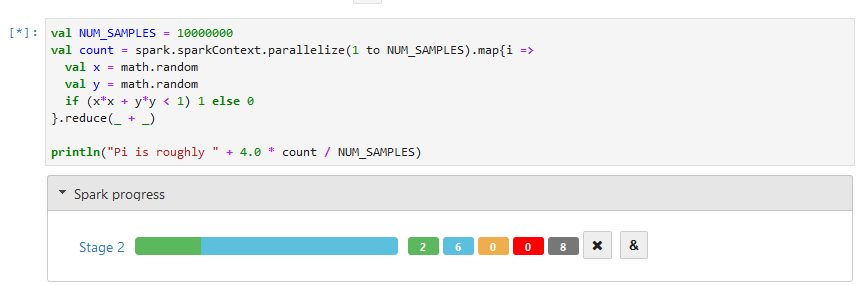
Tracking Job Progress
After a job has started, a three-way progress widget will automatically appear that shows the progress of the job and how many tasks are waiting, running, completed, or canceled.
Example 2: Plotting and Visualization
BeakerX provides a large set of special widgets for creating charts, graphs, and visualizations. These include interactive time-series, scatter plots, histograms, heatmaps, and treemaps. The widgets remain interactive in notebooks that are exported for hosting on other platforms and include features such as zooming or exporting to other formats.
Plot widgets in BeakerX are built in to the kernels, which means they can be accessed efficiently without needing to import additional libraries. The examples below how to create a bar chart and line chart.
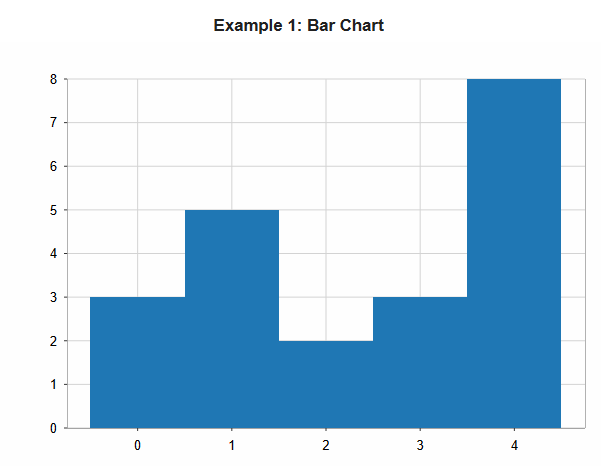
Example 1: Bar Chart
new Plot { title="Example 1: Bar Chart" }
    .add(new Bars{ y = Seq(3, 5, 2, 3, 8) })
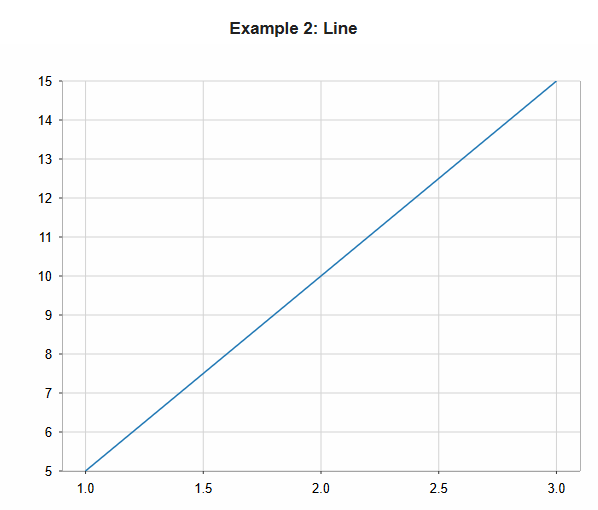
Example 2: Line Chart
new Plot { title="Example 2: Line"}
    .add(new Line {
        x = 1 to 3
        y = 5 to 15 by 5
    })
Just Getting Started
Kernels greatly expand the analytic power of Jupyter. They are a one important reason why Jupyter has become the de-facto standard for nearly many aspects of Data Science. The BeakerX collection of kernels provide many powerful features that greatly expand the capabilities of Jupyter, allowing it to work seamlessly with JVM based languages.
Comments
Loading
No results found